BY ERIC TREADAWAY
(This originally appeared as a 12-part segment on www.sourcehorsemen.com)
TREADAWAY’S DESK JOCKEY HOLIDAY EDITION: THE TWELVE DAYS OF GRAYSKULL
Back in January, when I was digging my original Castle Grayskull playset out of the basement, my three year old son saw the castle for the first time and was instantly fascinated. He actually came into the office with me that same morning which was when the digitally output armature first showed up at the studio. At that point it went from fascination to a temporary obsession. When I first saw the size of the armature, knowing the amount of time we had to work on this monster, I knew I was in for some very long days and nights at the office! To keep my son up to date on the castle I decided to take shots of the castle every night when I was wrapping up work. It was really the first time I started using my phone to document projects in progress, and it was actually the beginnings of the idea for the Desk Jockey segment!
——————-
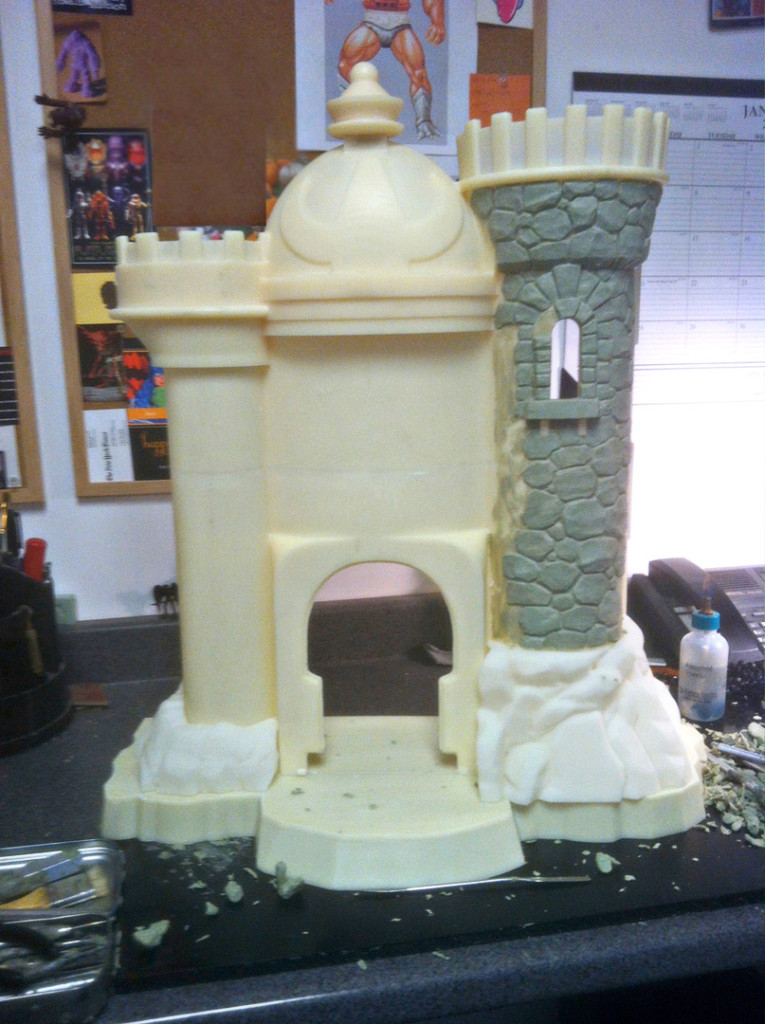
Day 1: Here is a great view showing a lot of what the armature looked like. It still blows my mind how much work went into this project! There were several weeks of work put in on the design and armature before we even got into the sculpting. Every single stone was added to the armature one piece at a time- like I said some very long days ahead!
Treadaway’s Desk Jockey: The Twelve Days of Grayskull – Day 2
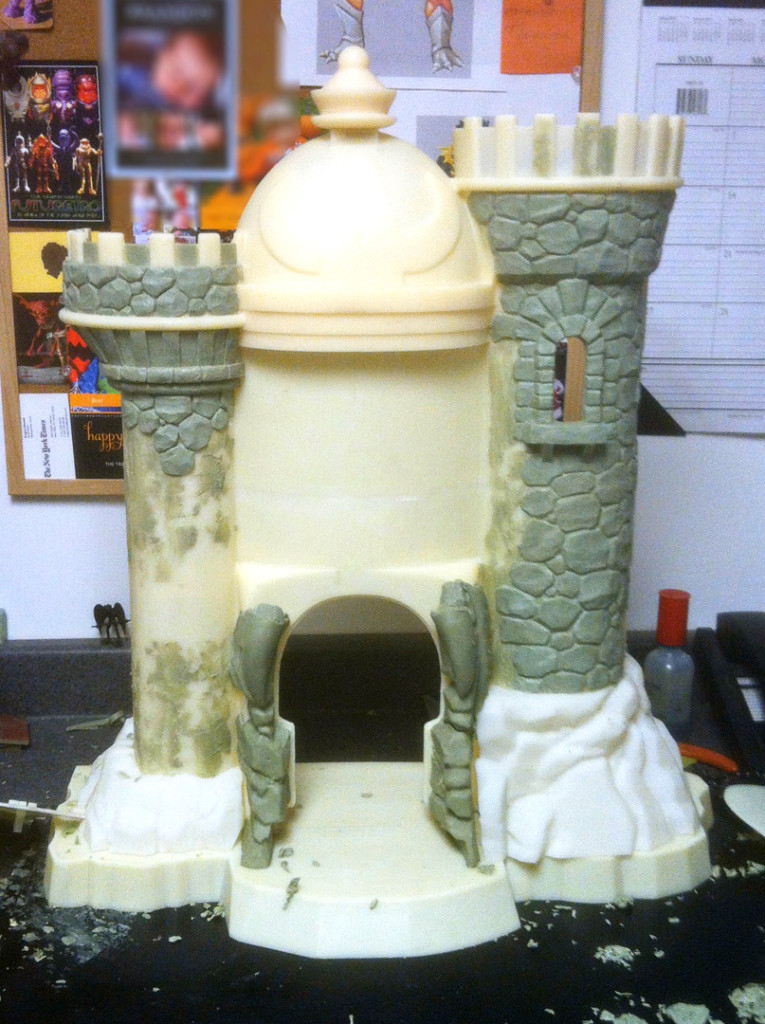
Day 2: More stonework! You will be hearing a lot of that in these posts. We have never done a count of how many rocks were put on the castle, but we know its an awful lot. One thing that is visible here is the process that was used to get the clay to stick to the smooth armature. We liquefied the Castaline (the sculpting material used here at the studio) and more or less “iced” it onto the surface of the armature. That way the material had a better chance at getting into every possible nook and cranny of the armature. Then the stones could be applied without any worry that they’d fall off.
Treadaway’s Desk Jockey: The Twelve Days of Grayskull – Day 3
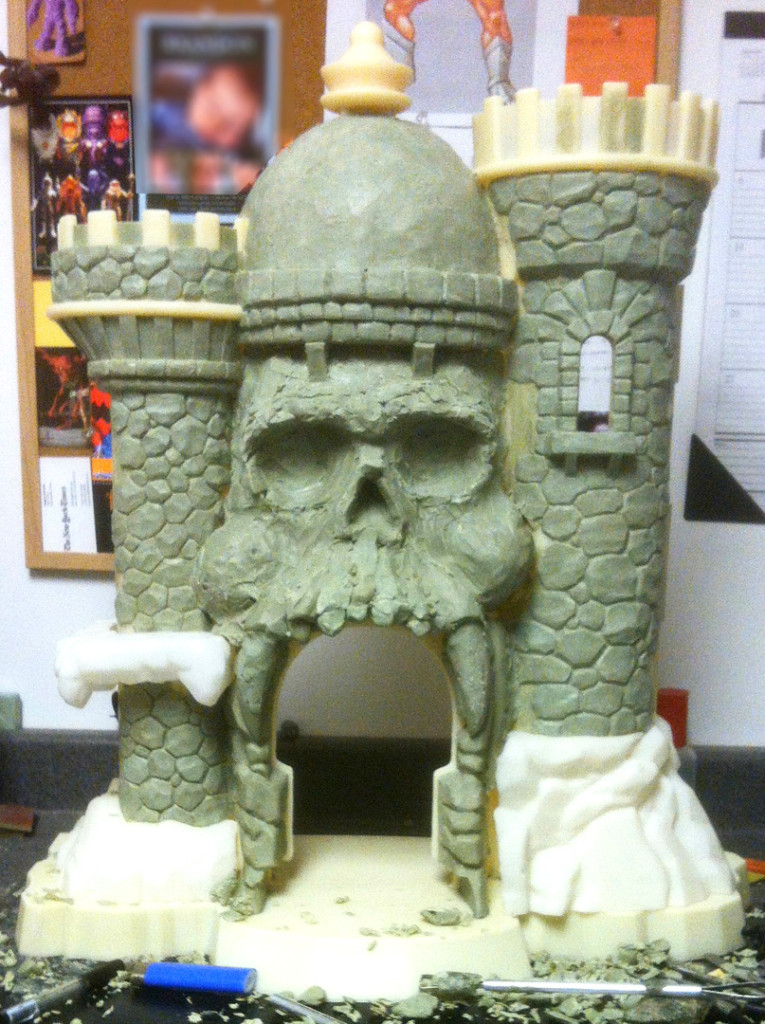
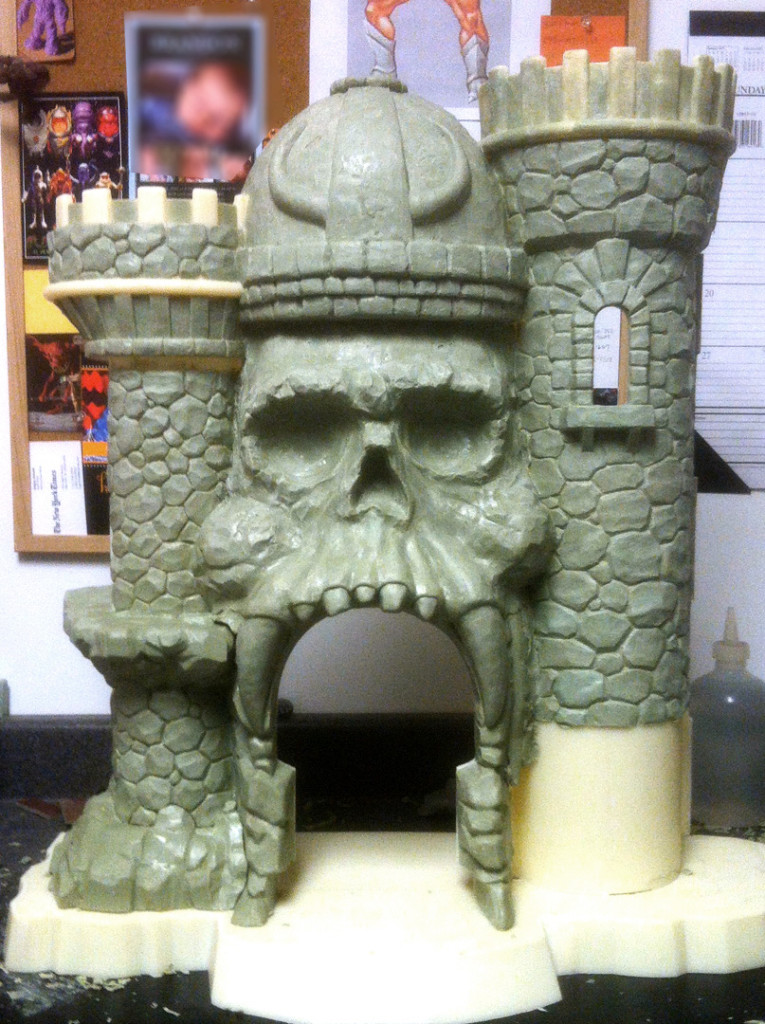
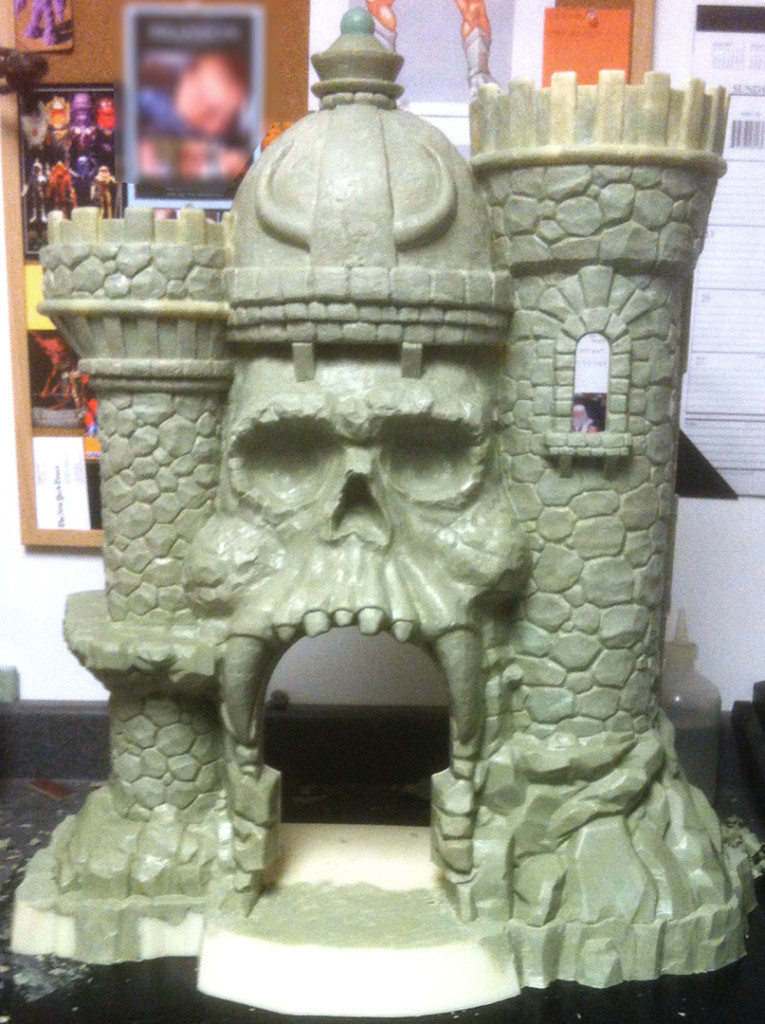
Day 3: This is a face that I’ve been looking forward to sculpting for a long time! One thing to look at here is that the face and helmet areas have been built up considerably from the armature. One of the elements of the original playset (and especially the Mark Taylor prototype) is the amount of depth on the castle’s facade. The deeply cut facial features help to put the emphasis on the castle’s creepy mysterious nature. These were qualities that were determined to carry over and play up in this version of Grayskull.
Treadaway’s Desk Jockey: The Twelve Days of Grayskull – Day 4
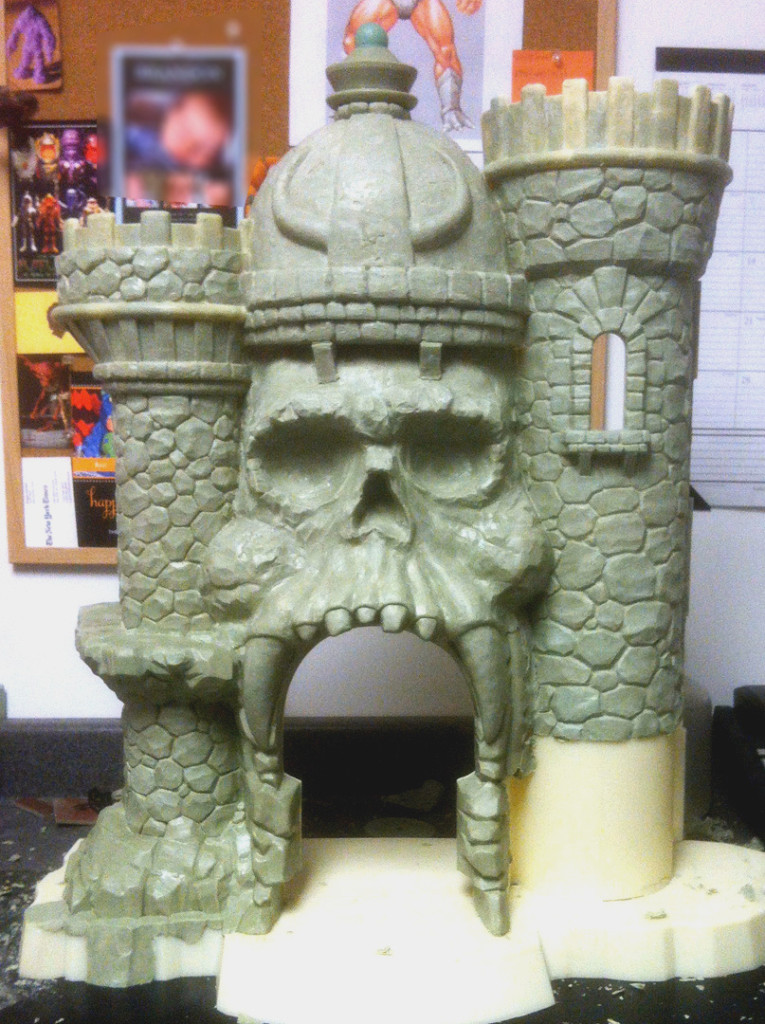
Day 4: Here is where some of the facial features are getting a bit more defined, and where the details on the helmet are being added. You can also see here where the empty areas on tower are filled with stone and connected up to the face.
Treadaway’s Desk Jockey: The Twelve Days of Grayskull – Day 5
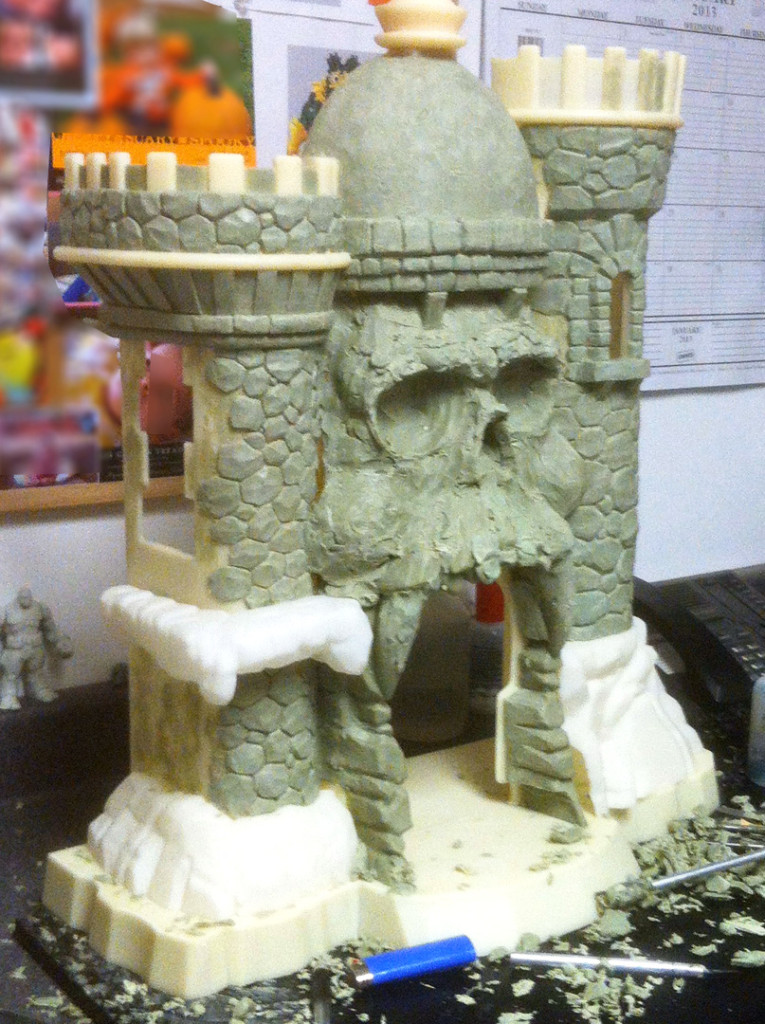
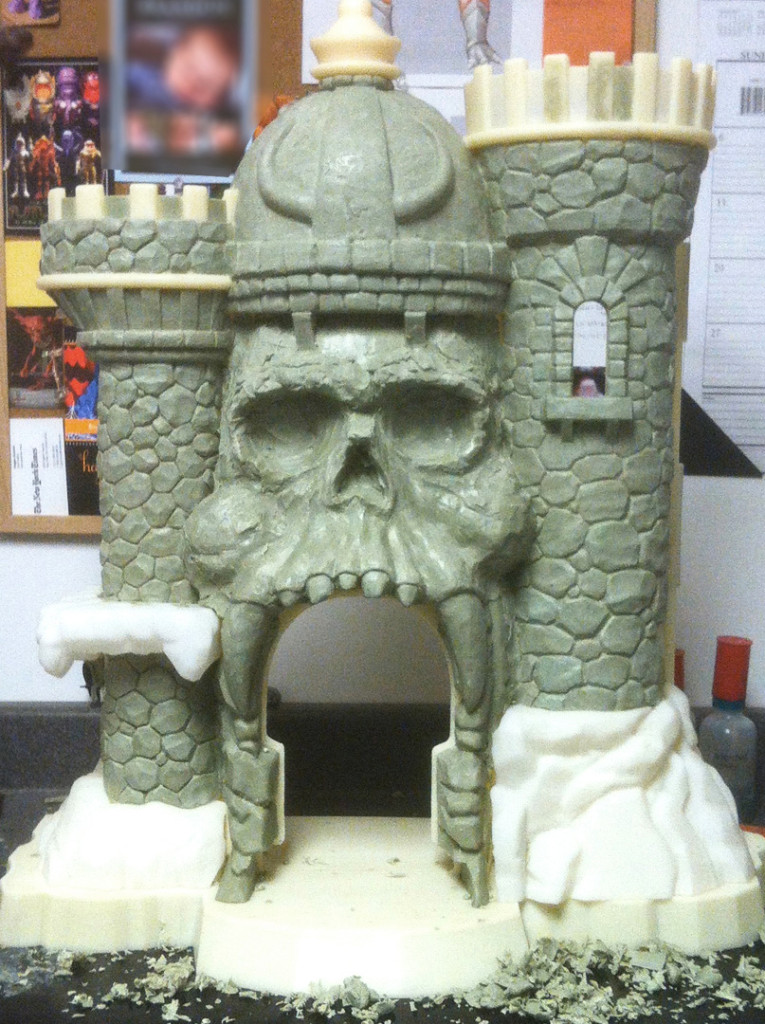
Day 5: The differences today are a bit more subtle. A lot more cleanup has been done on the face and helmet areas. This is also the point where I needed to convert the ledge and rock formation from the smaller tower from plastic to clay. To do that we mold up those pieces in silicon rubber like we would to create any of our other prototypes. With these, though, we will pour liquefied Castaline into the molds rather than urethane plastic, and we end up with a clay replica of the armature pieces!
Treadaway’s Desk Jockey: The Twelve Days of Grayskull – Day 6
Day 6: Here you can see the new clay rock formation added back at the base of the small tower. Now that area is ready to be reworked and fused into the rest of the sculpture. I have also sent the larger rock formation to molding and casting to be put through the same process. The second photo shows that the rocks were worked in on the side of the large tower, and where the armature at the top of the tower has been “skinned over” and detailed. That process allowed me to add a stone texture that matched the rest of the castle.
Treadaway’s Desk Jockey: The Twelve Days of Grayskull – Day 7
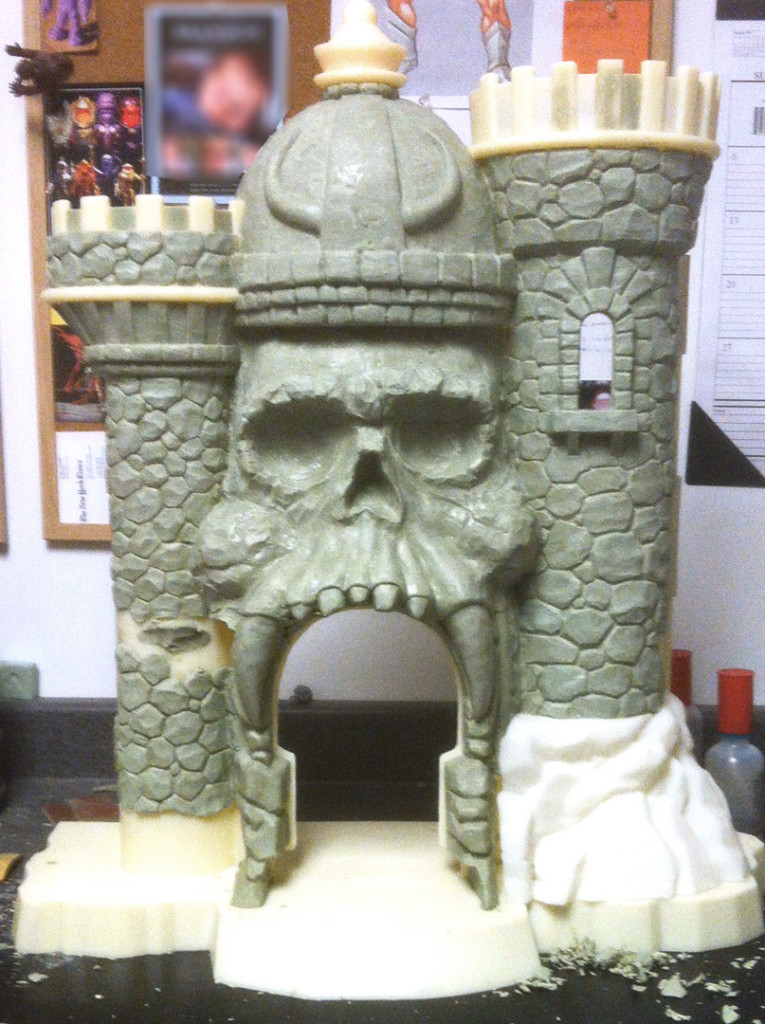
Day 7: If you look closely here, you can see the advantage of converting the ledge and tower base over to Castaline. As you can see, the ledge was completely reworked, and the stones at the base were reshaped to fit with the stones on the tower. There was a lot of integration that needed to happen, and having these pieces in the right material made all of the difference!
Treadaway’s Desk Jockey: The Twelve Days of Grayskull – Day 8
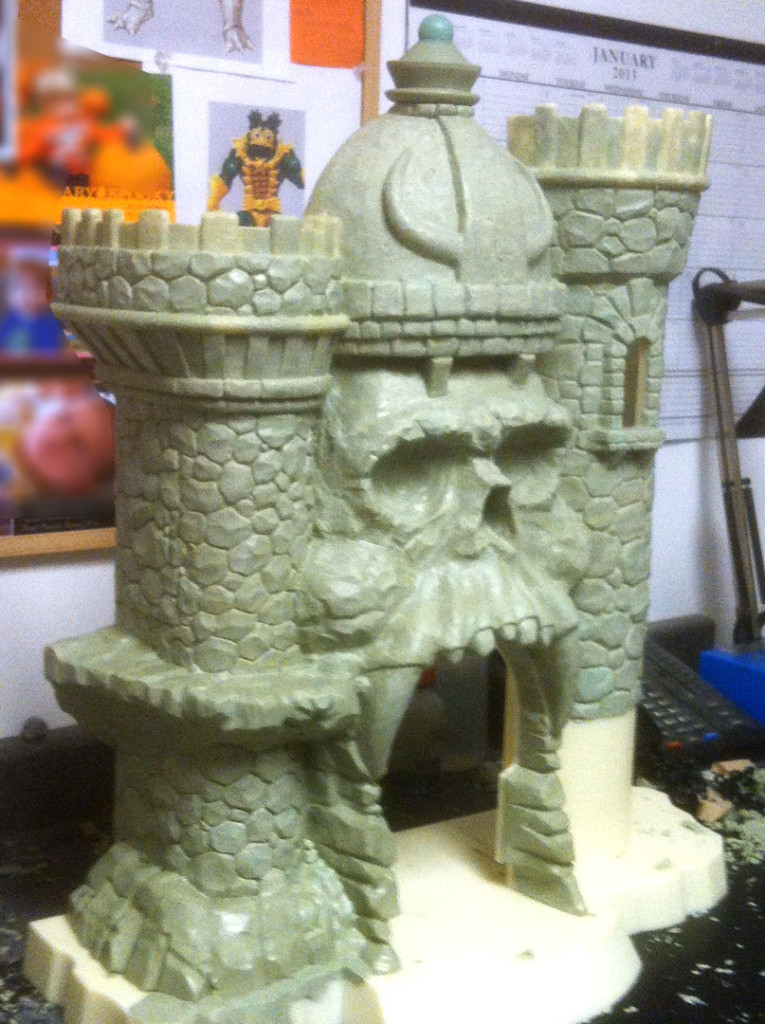
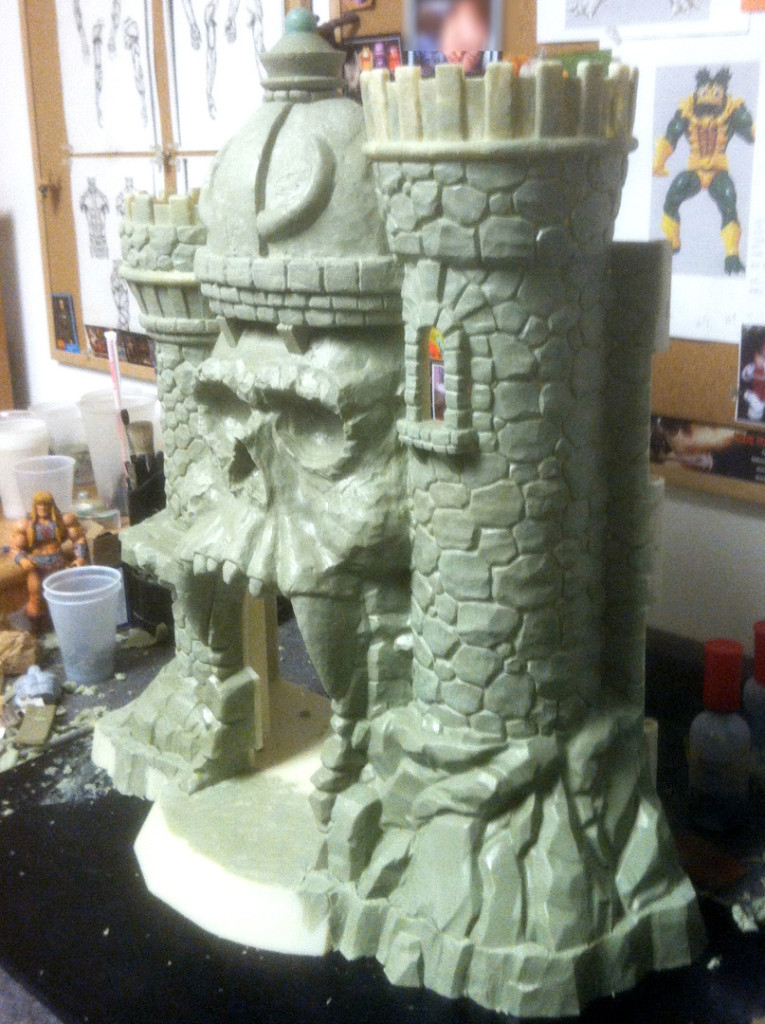
Day 8: Today was all about getting the side of the small tower covered. This was a spot where that depth of the playset came into play. There was as much surface to cover on the side of the tower as there was on the front! You can also see that the wooden supports under the helmet have been roughed back in. Also, if you look at the base you can see where I started to experiment with how the base would be addressed.
Treadaway’s Desk Jockey: The Twelve Days of Grayskull – Day 9
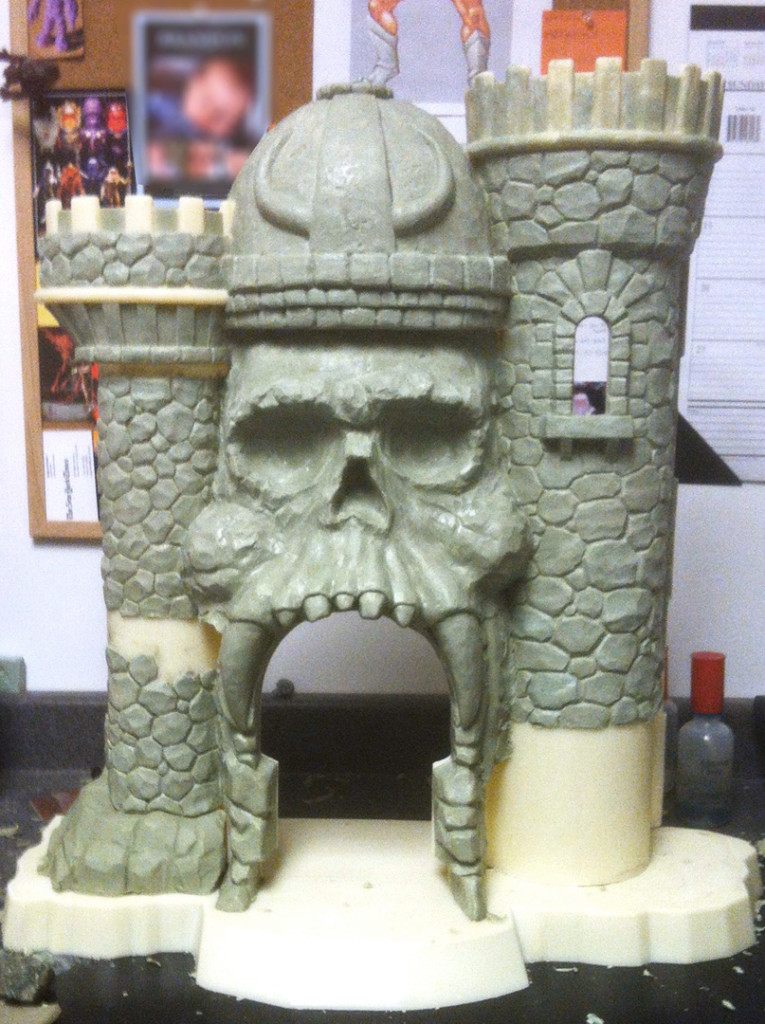
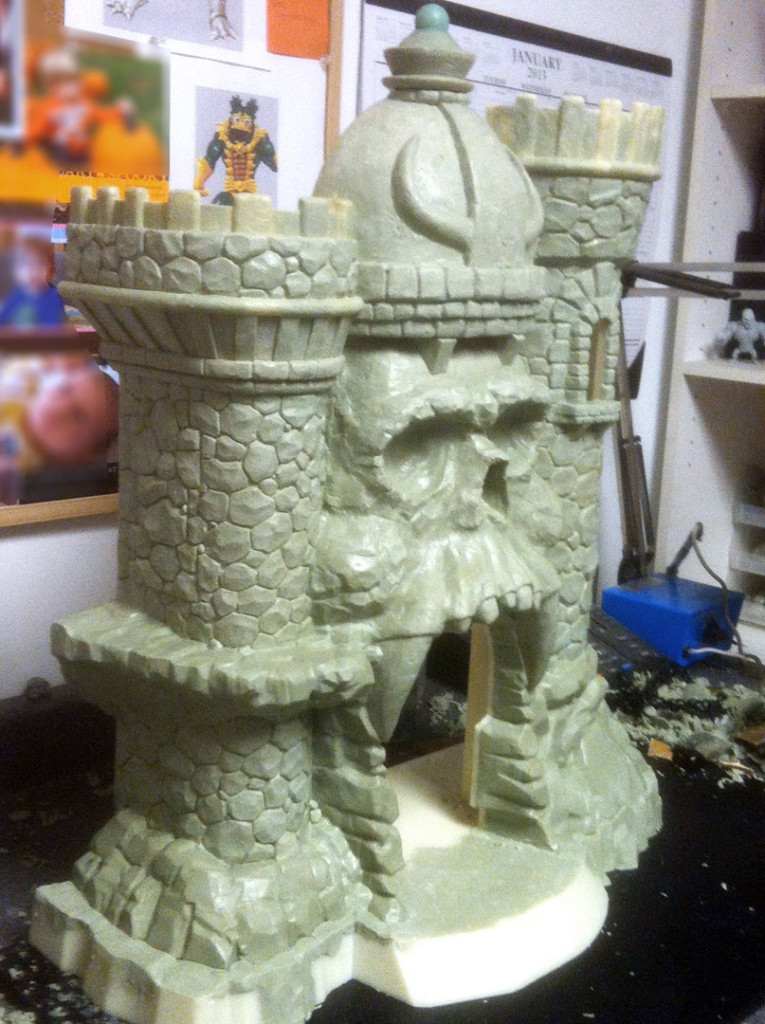
Day 9: The rocks at the base of the large tower are back and fully integrated into the rest of the facade. The front shell of the castle is pretty much done at this point. This is also when I start to get serious about the base, and how it is going to work in tandem with the rest of the castle. The idea is that the castle looks like it’s partially carved straight into the rocks, and partially built up, and the way that the base interacts with the rest of the castle is crucial to this.
Treadaway’s Desk Jockey: The Twelve Days of Grayskull – Day 10
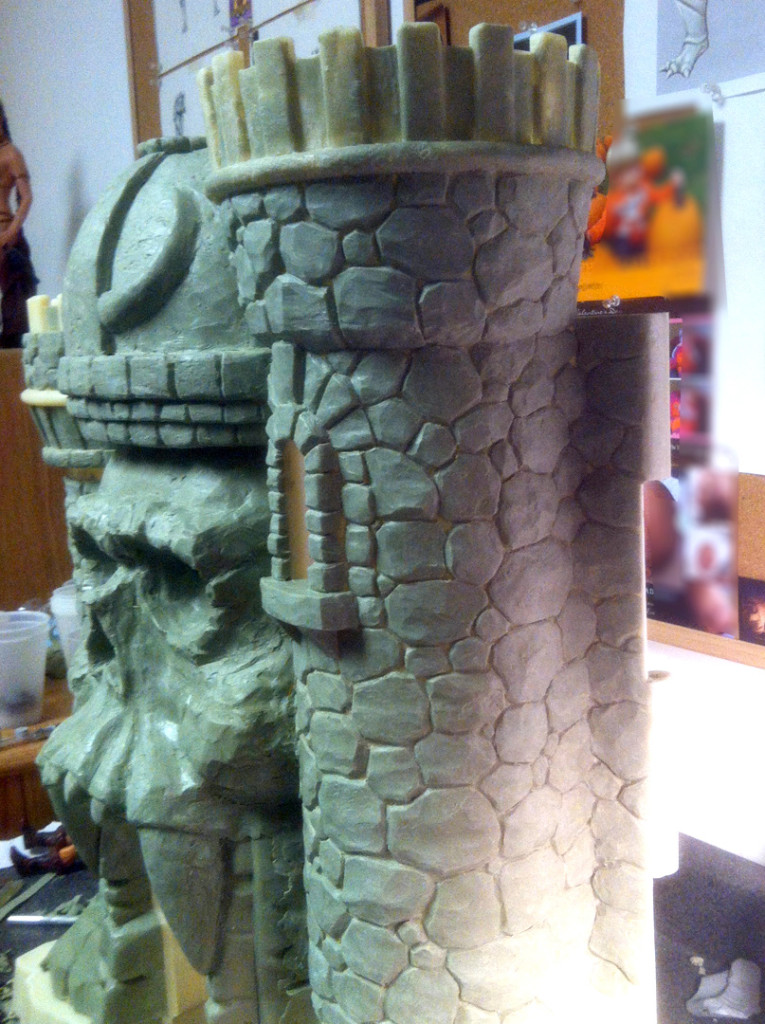
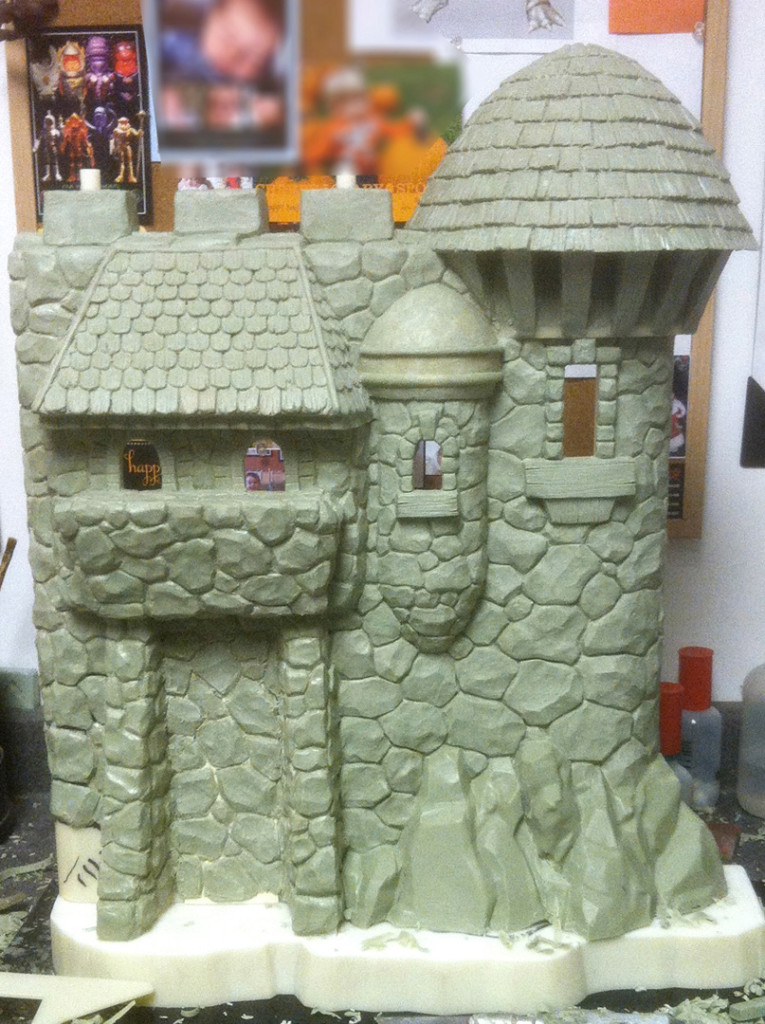
Day 10: This looks like a huge jump from yesterday, but this is a lot more than one day’s work. While I’ve been working on the front wall, Shane has been doing double duty, and taking the sidewall home with him at night for some sculpting. I’ve had it for about ten or twelve hours at this point, and all I’ve had to to do is just cover some surfaces that Shane didn’t have the time to get to. Shane really nailed it, so we are in great shape at this point! Everybody was going the extra mile on this project, and it definitely shows in the final product.
Treadaway’s Desk Jockey: The Twelve Days of Grayskull – Day 11
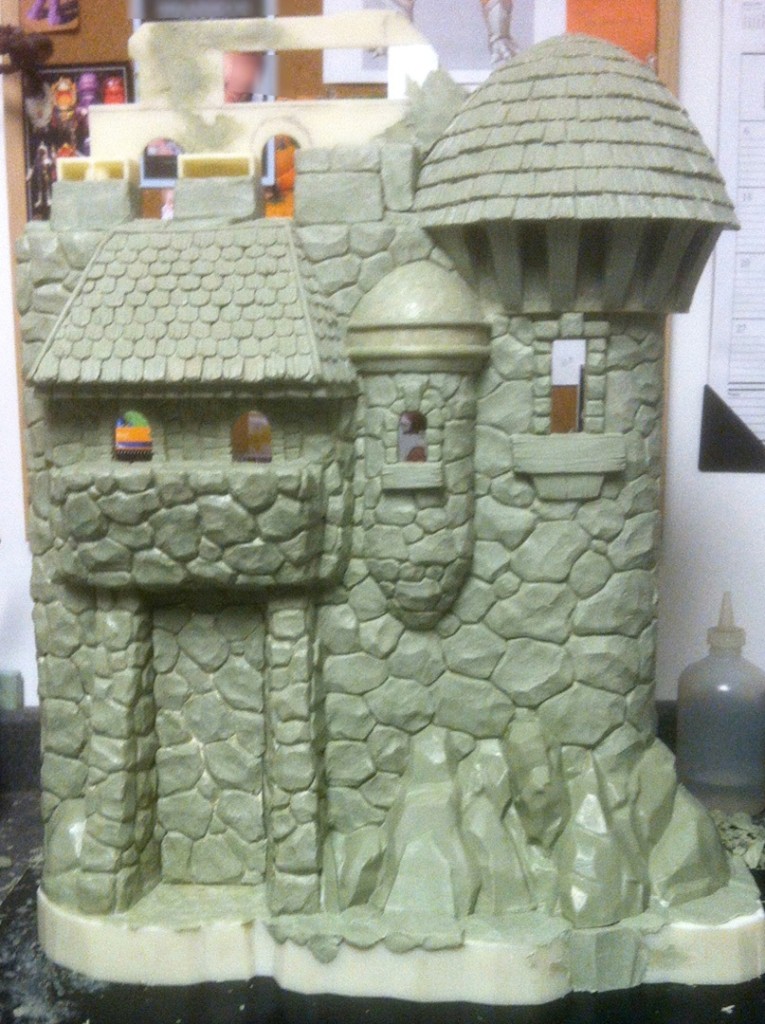
Day 11: There is definitely not as big of a jump in progress today! Here it was mostly cleanup, and getting the base covered and integrated with the wall itself. This was also where the carrying case handle section was started. We felt like we were in the home stretch around this point (at least on the outer shell), but not surprisingly when working on such a huge project we hit a snag. We decided to see what the castle looked like when it was closed for the first time in a while, and we were unpleasantly surprised. From the front view it looked terrible. Things weren’t lining up as well as we’d like and we could see way too much of the inside of the back tower and the handle armature was huge! We literally sawed into a near finished sculpture and started reworking the armature. Luckily things went pretty smoothly, but it just goes to show that projects this big are full of surprises. If you look closely at the armature for the handle section you can see where it was cut up and patched with styrene plastic.
Treadaway’s Desk Jockey: The Twelve Days of Grayskull – Day 12
Day 12: At this point the outside of the castle was completely finished. There was a lot left to do on the inside including, the door, all of the interior stonework around the windows and doors, the dungeon, and what seemed like a never-ending list of accessories. The original castle was sitting in my office the whole time this project was going on. This was the day I just happened look over at it, and was not only blown away by how massive this new castle was, but I was taken aback by how amazing it’s been to finally work on this legendary castle that I obsessed over for so many years as a kid and have dreamed about sculpting as an adult. It’s surreal that I’ll be able to share the experience with my own kids so many years later. There have been a lot of ups and downs with Grayskull ever since it was announced, but I hope that everybody out there that gets one of these behemoths will get as much joy out of playing with it as we had making it!

[…] original posts, including the full resolution of most of the images, on his Power Lords Return site (he also runs the Adam Power YouTube channel). I’d recommend going through and reading it. […]